Tank Combat, Part 1
Summary
Basic boss fight, hack and slash style. Largely focusing on the animation, this project is fairly simple from a technical perspective.
Project Goals:
Project Goals:
- General animation practice
- Practice animating cinematics (which I really don't like to do, but it's good to at least learn the basics)
Video, Part 1
Tank melee combat
The tank was modeled by Curtis Norton. His work can be found here: www.artstation.com/artwork/lVPKv5
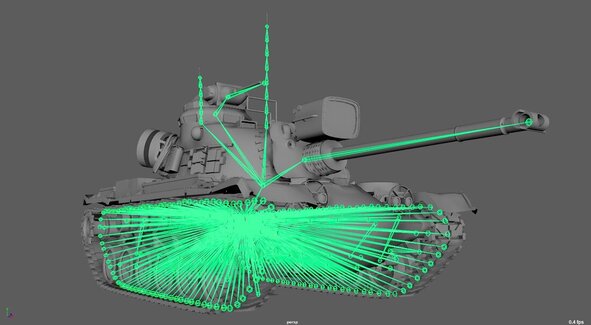
Rigging was very tedious.
The actual process of animating the tank for the most part is pretty simple, because it's basically a box with a turret. An important trick I did was to treat the hull of the tank as a torso and the turret/cannon as the arms. For the turret swipe attacks, the hull would rotate first, pulling the turret behind it, just like a human twisting their torso to generate the power to swing a heavy object around.
As is common in hack and slash games, there is a distinction between basic attacks and heavy attacks. Also, the basic attack combo will increase in power as you continue the chain. A general rule I established for the tank was that weaker attacks are faster and mostly are limited to using the turret, and stronger attacks are slower and involve using the hull of the tank as well. Since the turret is a smaller part of the tank, it's natural for it to be faster and weaker while the larger hull creates a large silhouette change to help convey the power of a heavier attack.
As is common in hack and slash games, there is a distinction between basic attacks and heavy attacks. Also, the basic attack combo will increase in power as you continue the chain. A general rule I established for the tank was that weaker attacks are faster and mostly are limited to using the turret, and stronger attacks are slower and involve using the hull of the tank as well. Since the turret is a smaller part of the tank, it's natural for it to be faster and weaker while the larger hull creates a large silhouette change to help convey the power of a heavier attack.
Notice the turret/cannon swings dragging behind the rotation of the hull. The overlap helps to generate power in the swipes by making the turret feel weighty.
Light attacks can also be extended briefly by firing the machine gun to be able to deal some extra damage without committing to an entire attack.
The machine gun can freely aim in any direction while firing.
The free aim for the machine gun posed a fun challenge, which I solved without making any new animation assets for this mechanic. When the player triggers the machine gun (by continuing to hold down the basic attack button), the attack animation pauses while the machine gun fires. The machine gun's aiming and recoil are both done procedurally. An interesting thing about the procedural aim was that the Yaw and Pitch values had to be calculated separately because in a tank's turret, the turret controls the Yaw aim and the gun controls the Pitch.
The calculation nodes and Animation Graph for the machine gun's procedural aim. Notice that in the Animation Graph the Yaw modifies the "cupola_jnt" (turret) and the Pitch modifies the "cupola_gun_jnt" (the gun).
The tank's jump animation can only be activated from certain attacks. A unique initial jump animation was made for each attack that the tank could jump from to make the transition smoother.

Showing the Mecha's Personality through Animation and Game Design
The mecha is by Tre Vital, who's rig can be found here: trevital.gumroad.com/l/ZyNEq
I rerigged the mecha to make it game-ready and able to separate his "jet blades" to form them into a glaive.
I rerigged the mecha to make it game-ready and able to separate his "jet blades" to form them into a glaive.
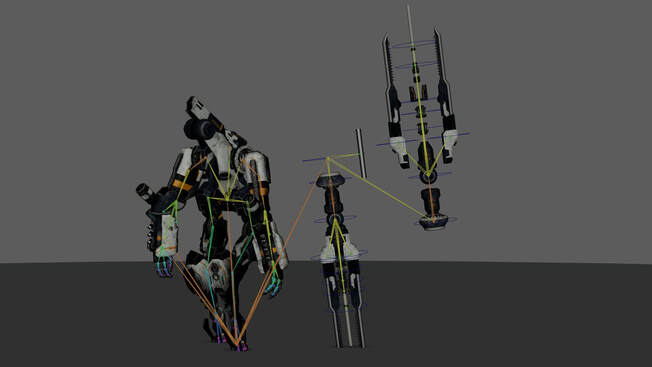
As usual, I began with the idle pose to start determine the personality of the mecha. I decided to give him a sort of casual attitude, but he's also a bit of a show-off which reflects in his posture and design. Many of his movements and attacks are needlessly flashy but he always tries to look like he puts no effort into them, so they flow very smoothly.
The game design can also help show his personality. He never moves at a faster pace than a walk in this phase, which was a deliberate choice to show that he's not taking the fight very seriously. He has slow turns and most of his attacks don't travel very far, so they can be avoided by simply running away.
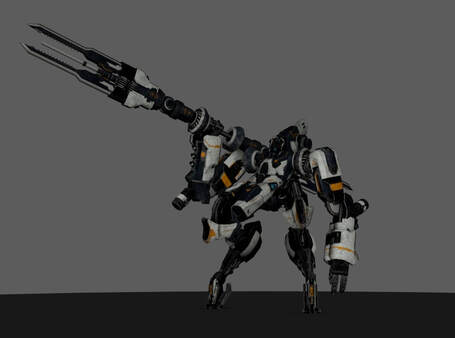
His idle posture makes no real effort at a good stance for either defence or offence, implying a "no-care" attitude.
|

|
Some of his attacks look more like dance routines or WWE moves than actual attacks.
The turns are slow and not very aggressive. For the 180 turns he simply twirls around on one leg in a lazy manner using the momentum of a kick.

|
|
As I've stated before, I look at reality for creative inspiration. An obvious choice for the way the mecha flies in is a pigeon's flashy corkscrew landing.
Runtime Cutscenes with Interaction
This is my second time attempting runtime cutscenes with interaction. The first time was about 3 years ago and I built off my previous attempt at it, but this time it's a lot more robust (and the animation is not as cringe... lol).
The camera setup in Maya is straightforward. I made a joint chain of two where the root is attached to the root of the tank, and the single joint is attached to the Maya camera. This way I can export the camera's movement relative to the root of the tank easily to Unreal. For the Field of View (or Focal Length in Maya), I just used the joint's X scale to hold the Focal Length value and extracted it in Unreal.
I usually don't "cheat" the camera even while animating to camera. I find that cheating the camera often can make things feel strange in the camera view, so I try to keep things working from any angle even while posing them for the camera. I call it "posing in 2D and animating in 3D".
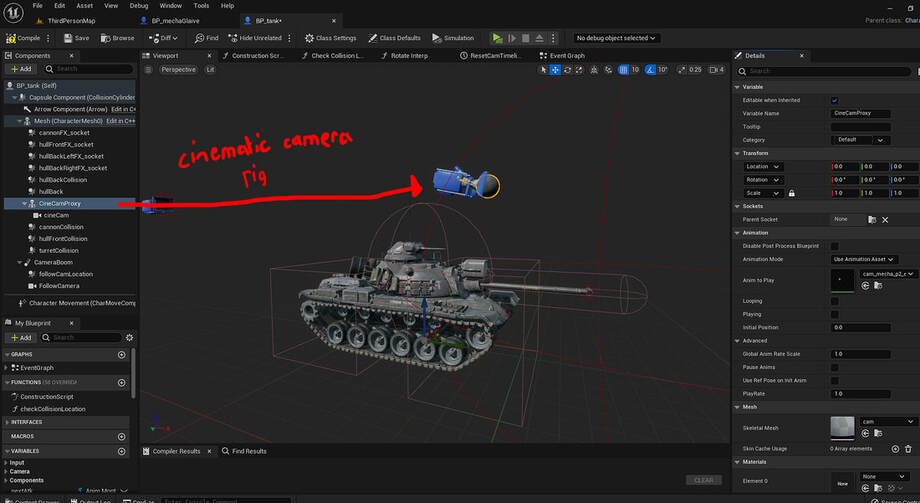
The camera skeleton/rig is attached to the character mesh in the character Blueprint. I put a proxy camera attached to the camera joint (the one called cineCam) to help with visualisation, but it's not really necessary as I could simply attach the player camera to the joint directly instead.
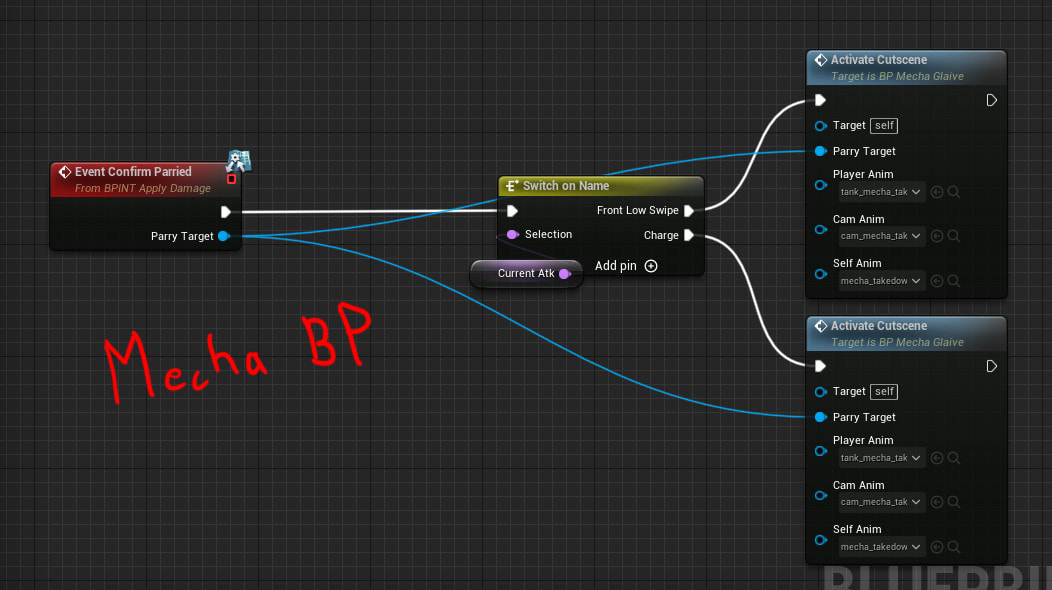
With my setup, cinematic events can come from any Blueprint. However, most of them come from parry events in the mecha's BP, so that is the example below. The "Confirm Parried" event comes from the player BP, which is triggered when the player is in a parry state when being hit by an attack from the Mecha that can be parried.
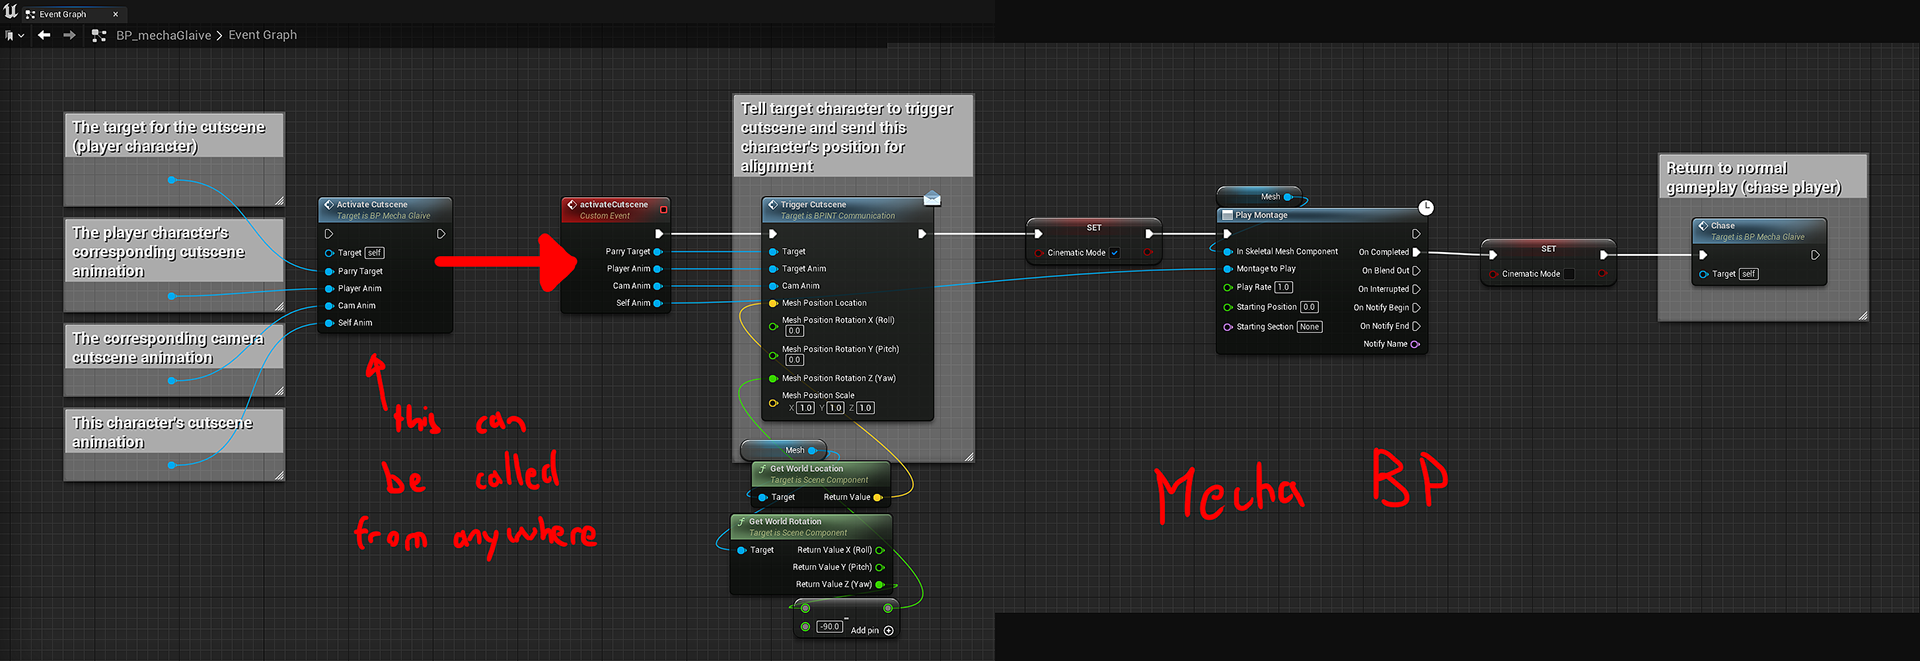
The "activateCutscene" is the important event that includes information on the targeted actor that should play a corresponding cutscene animation (called the Parry Target, which in this project is always the player) as well as what the target's animation and the camera animations are. This way, each cutscene that comes from the Mecha can have unique corresponding player animations.
When the "activateCutscene" event is called in the Mecha BP, it immediately also triggers it in the target actor (the pin called "Parry Target"), which again in this case is always the player character. This sends the position of the mecha as well so the player character can be aligned to it correctly. The corresponding player and camera animations are also sent through this event so that all the actors are playing the correct cutscene. Then it plays the mecha's cutscene animation.
In the player BP, first any active montage is cancelled and the collision is disabled so that it can overlap the mecha's BP without any issue. Then the position of the player is set to the exact same position as the mecha so that they are aligned correctly, after which the appropriate player character's and camera's animations are played.

Every cinematic animation starts with the player, the mecha, and the camera's roots all being in the exact same position on the first frame as shown below. This allows me to easily align everything by simply placing them in the same position during gameplay at the start of each cutscene.
The blue pill is the player's root and the red pill is the mecha's root. The camera is always attached to the player's root so that its animations are always relative to the player.
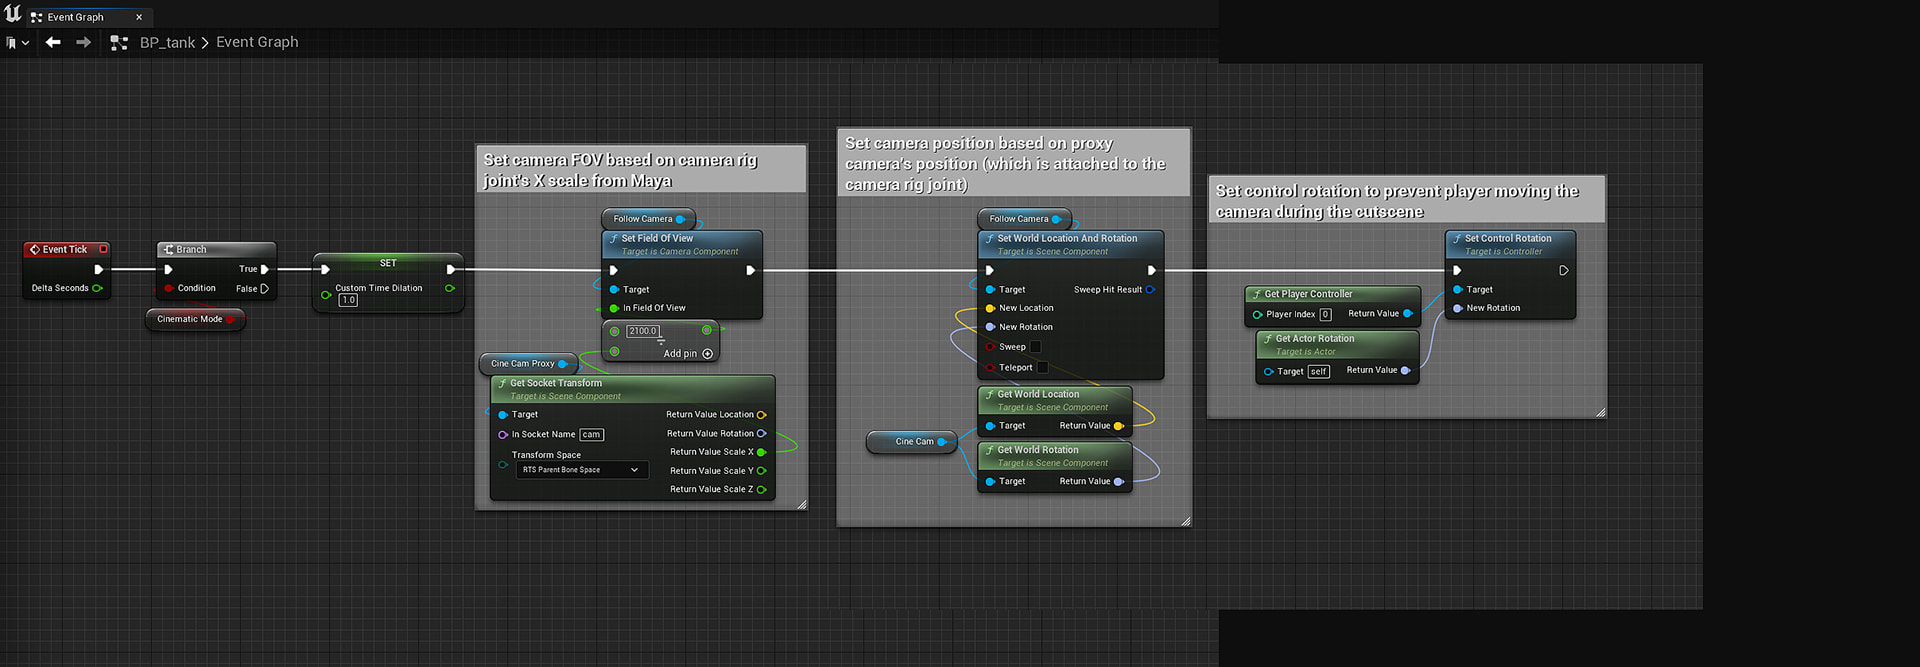
When the player/enemy switch to cinematics mode, the game camera instantly snaps to the proxy camera joint's location/rotation and reads the X scale for the FOV. This is updated per tick.
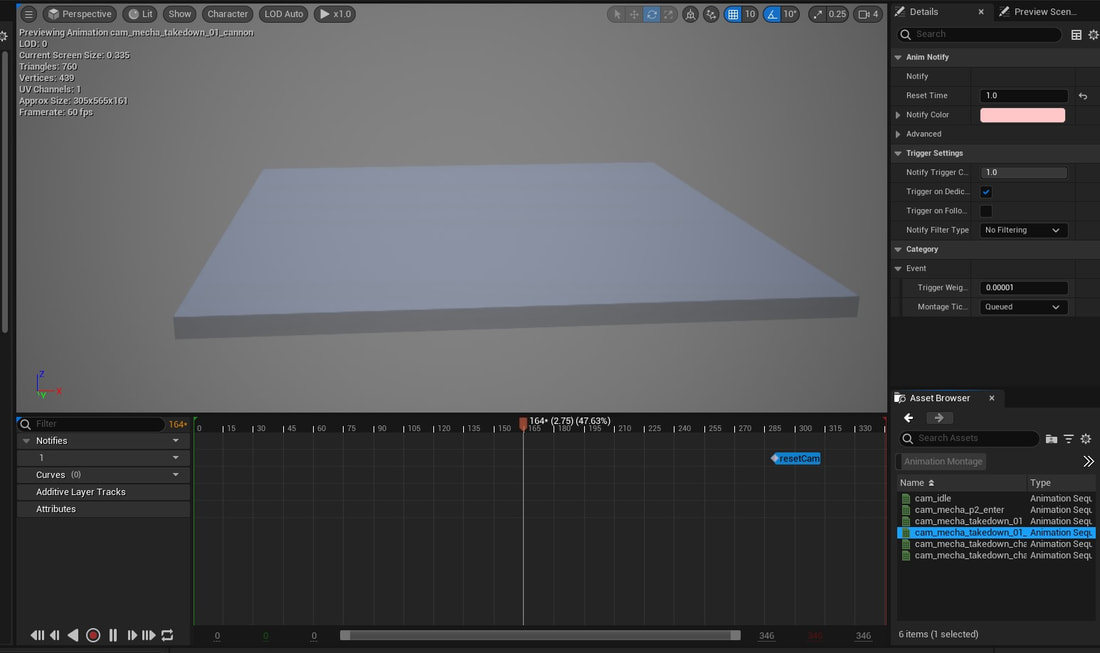
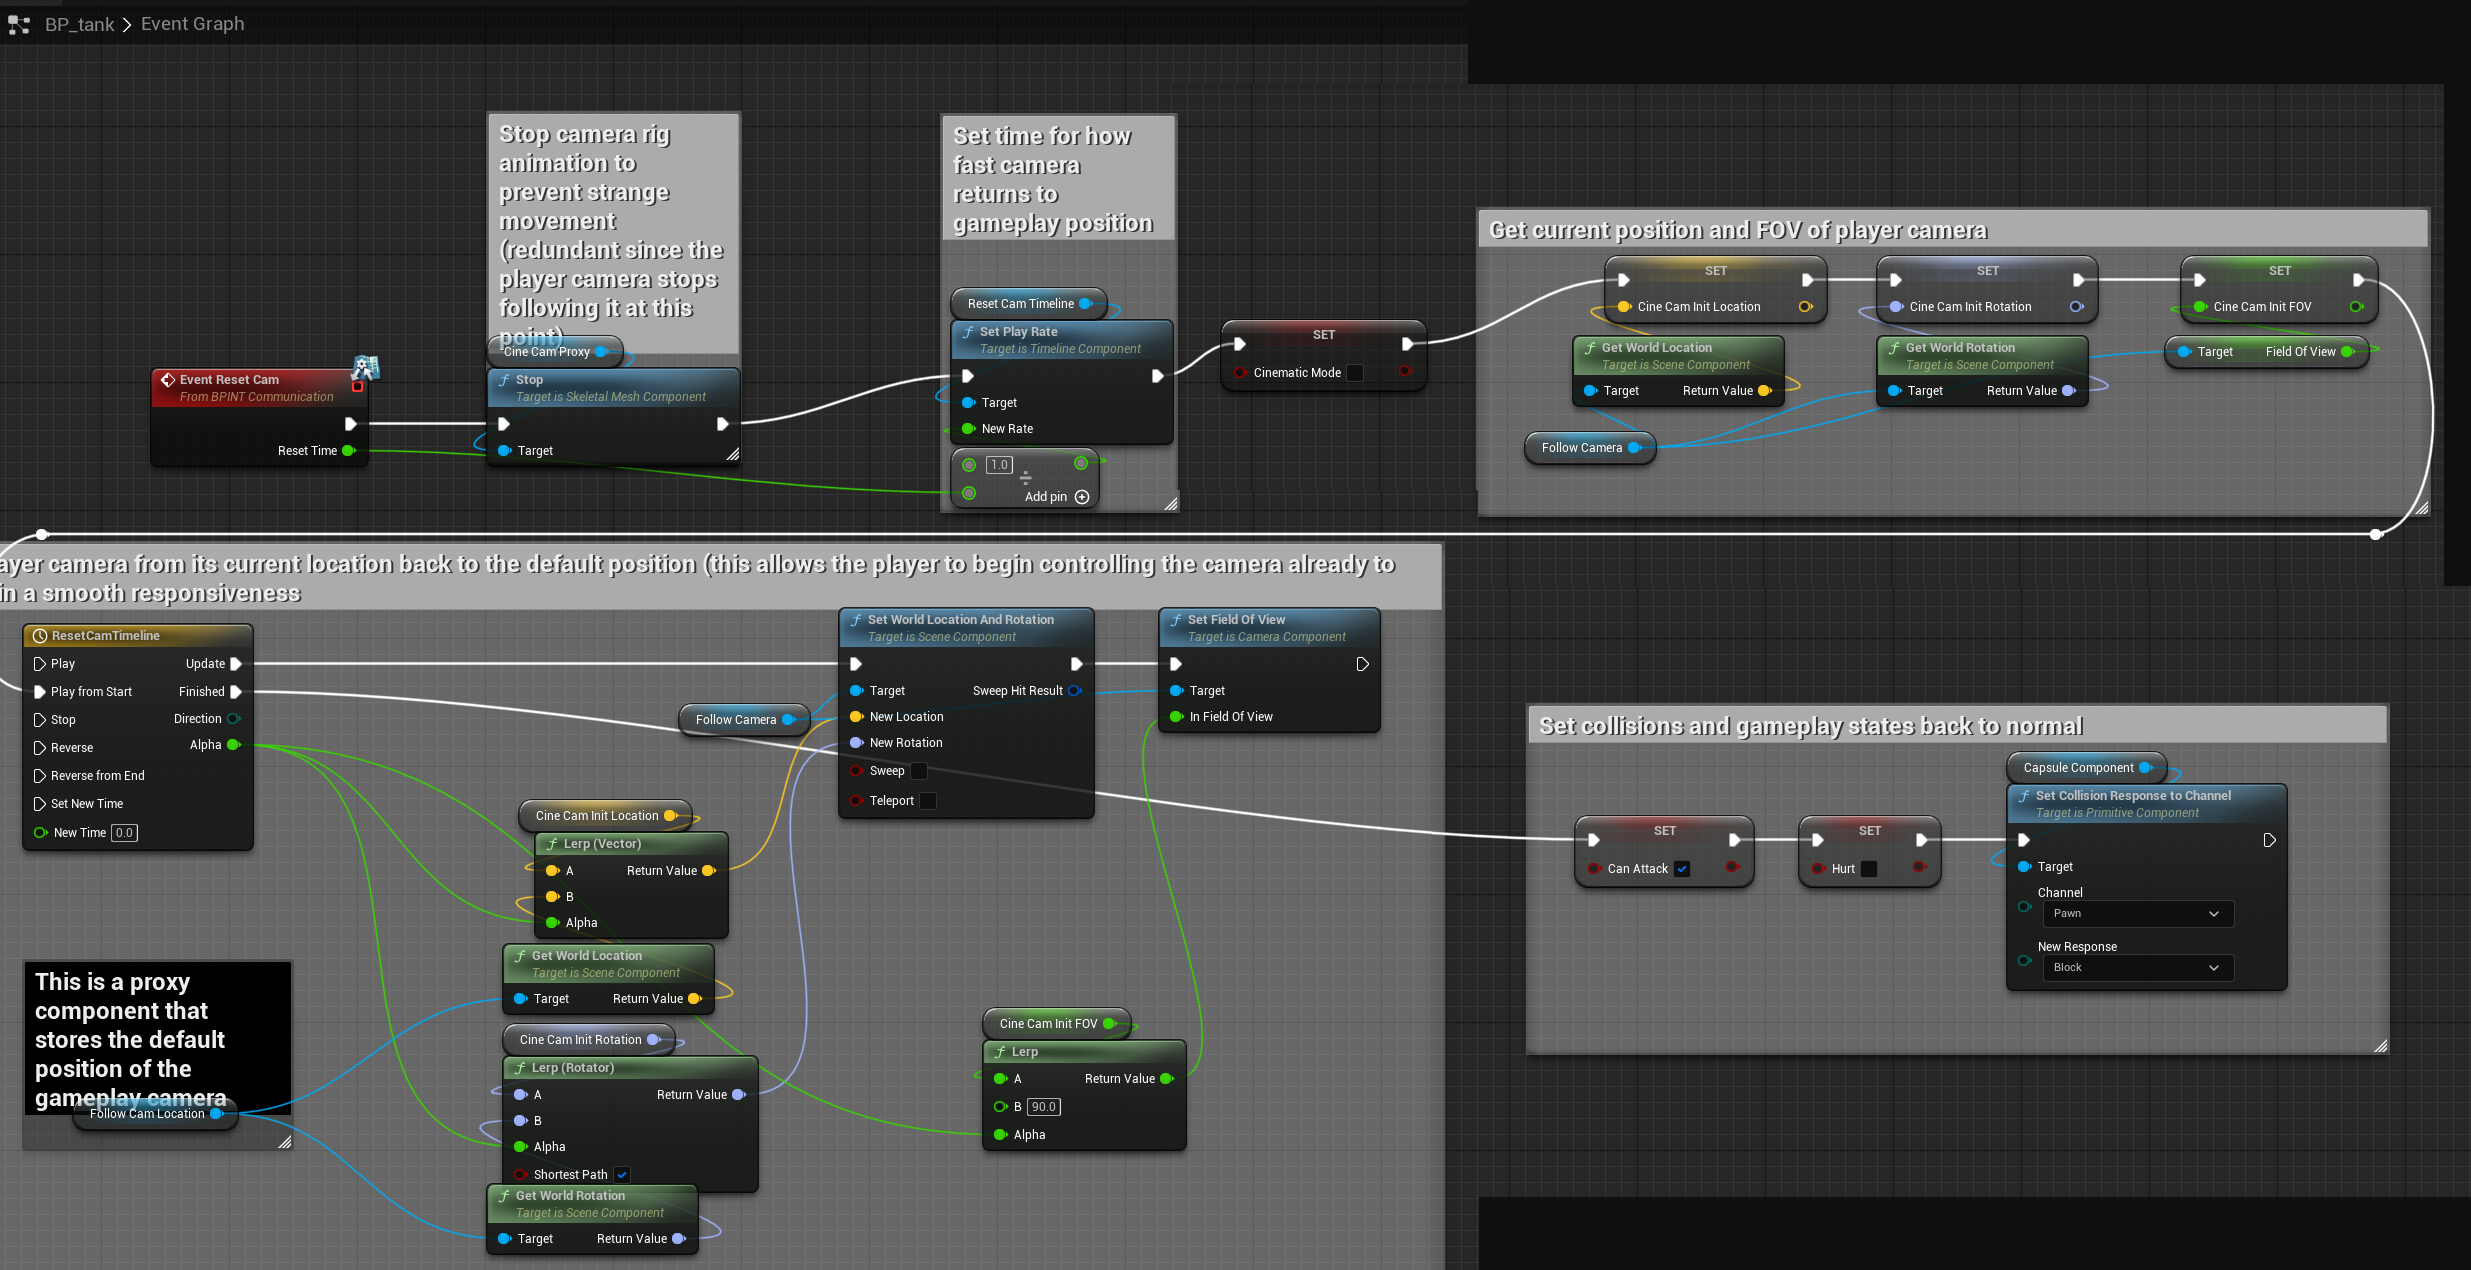
After the cinematic is over, the camera is reset through a timeline, triggered by an event called ResetCam, which is triggered by an Animation Notify in the camera's animation sequence. The camera lerps from its initial position when ResetCam is set to its default position behind the player. I can control the time it takes to blend out by changing the play rate of the reset timeline.
At this point, this was enough to make a cinematic play and then reset back to the normal gameplay state. However, after this I added the machine gun and cannon mechanics, and so decided to incorporate them into the cinematics as well for fun. Luckily, it wasn't too difficult to add them.
Since the machine gun fires actual projectiles, I had to make sure that it was aimed correctly during the sections where the player can fire it during cutscenes. The procedural aiming is disabled during cutscenes to ensure this.
I added a proxy aiming line to the machine gun in Maya to assist with aiming it correctly during cinematics.
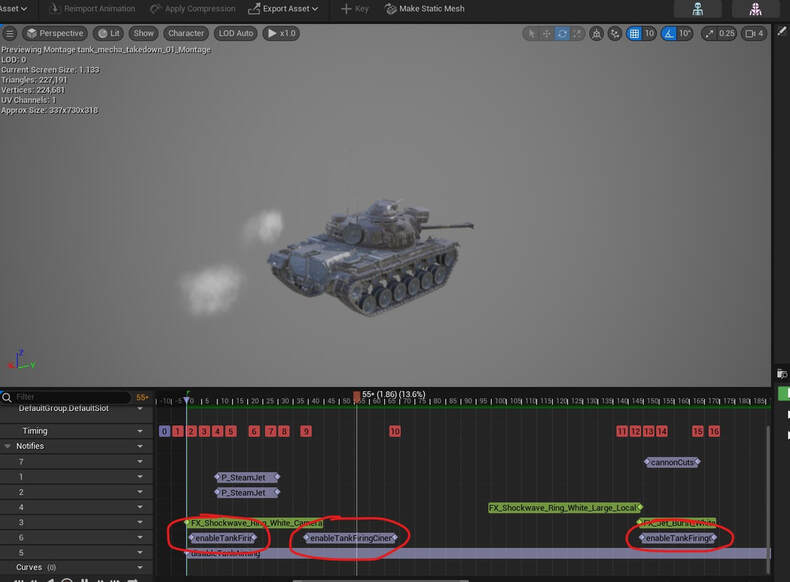
Animation Notifies (circled in red) enable and disable the machine gun firing during cinematics.
An advantage of the cutscene being runtime is that the machine gun effects such as the VFX, the mecha's damage reactions, and camera shakes are all automatically applied during the cutscene without any extra work.
The cannon was also straightforward, though a little more work on the animation side. Basically I just had to animate a separate sequence for if the player fires the cannon, and then add a notify that tells the actors when the player can fire the cannon and which animation to play if the player does fire it.
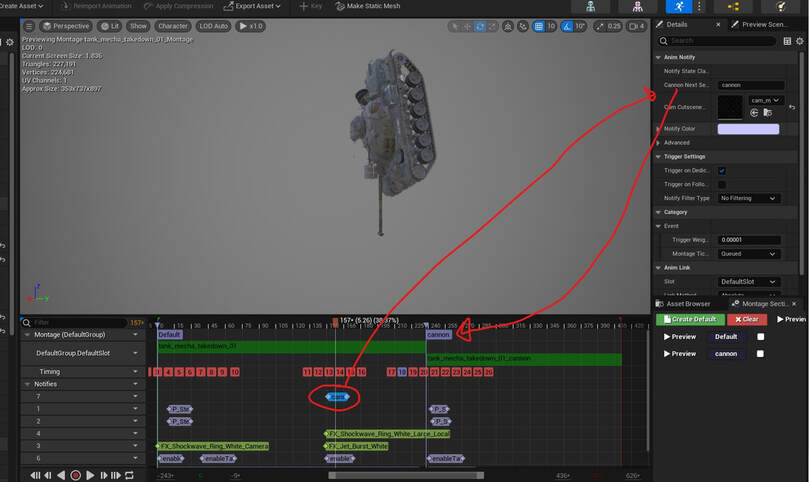
The circled notify is the window in which the player can fire the cannon. If the player fires the cannon, the animation jumps to the "cannon" section on the right side in the Montage. I can add as many sections as I want for different branching paths if I wanted to since each notify has its own unique tags.