XingZuo Temple Project - 2D fighting game
Summary
Figuring out the elements that make up a 2D fighting game to practice my 2D animation. The main inspiration is from Waku Waku 7, a game I played a lot in my childhood.
This project is the most extensive 2D anim project I've done so far and was a fun learning project.
Note: the character does not belong to me. She was designed by a friend and used with his permission.
This project is the most extensive 2D anim project I've done so far and was a fun learning project.
Note: the character does not belong to me. She was designed by a friend and used with his permission.
Video
Doing 2D Game Animation for the first time!
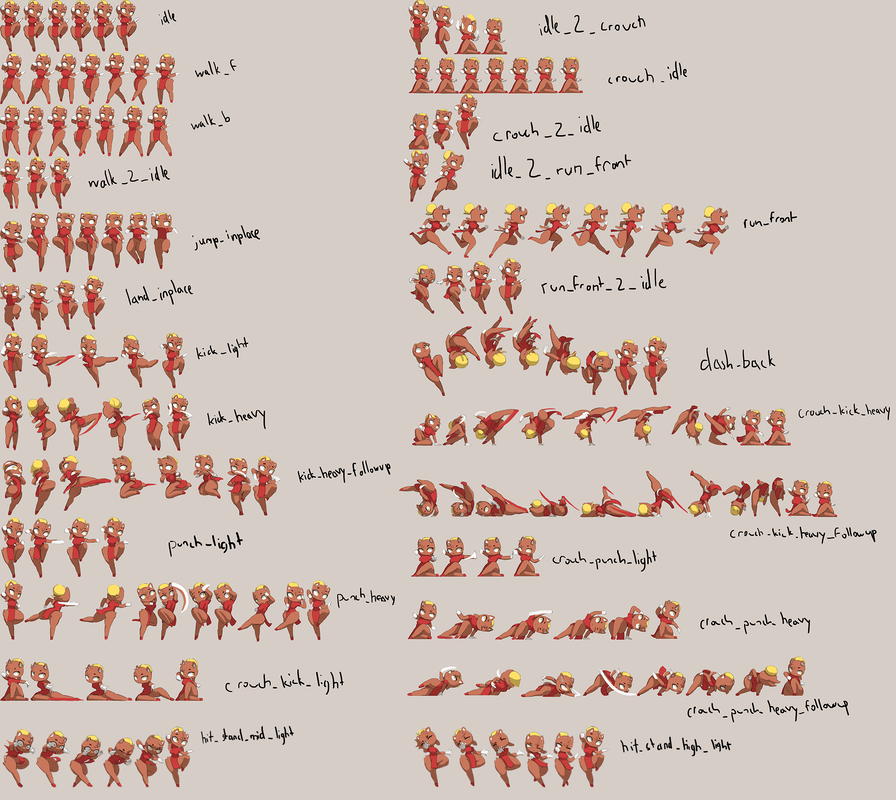
Since this is the first time I've done 2D anims going into a game engine, naturally I used 3D games as a reference for what animations are needed as well as some old 2D fighting games such as transitions, locomotions, etc.
I start from the idle and basic locomotion and build out the rest from there. I like to make smooth and fluid movement so I also made start/stop transitions for walking and sprinting.
I imagined this character to be light and fast and hits with a barrage of attacks, so most of her moves have very short anticipations and recover quickly, and several of them chain into combos (marked with the suffix "_followup". She is also highly energetic and cheerful which I tried to convey through the way she moves and attacks.
Most of the sprites I made for this.
As I made more animations I improved my workflow to make them more rapidly (and higher quality) which I mention some below. Some of these are probably already prevalent among higher skilled 2D animators but I only started doing it recently as I'm still pretty inexperienced with 2D and I'm out workflows.
-Keeping the idle pose on the side at all times to maintain proportions
-Switching from straight-ahead to pose-to-pose to avoid wasted frames and maintain consistent frame rate across animations
-Reusing body parts (especially heads) to maintain quality and also save time
-Keeping the idle pose on the side at all times to maintain proportions
-Switching from straight-ahead to pose-to-pose to avoid wasted frames and maintain consistent frame rate across animations
-Reusing body parts (especially heads) to maintain quality and also save time
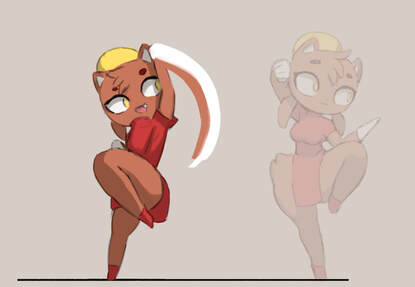
Keeping a ghost of the idle on the side - helps to maintain correct volume.
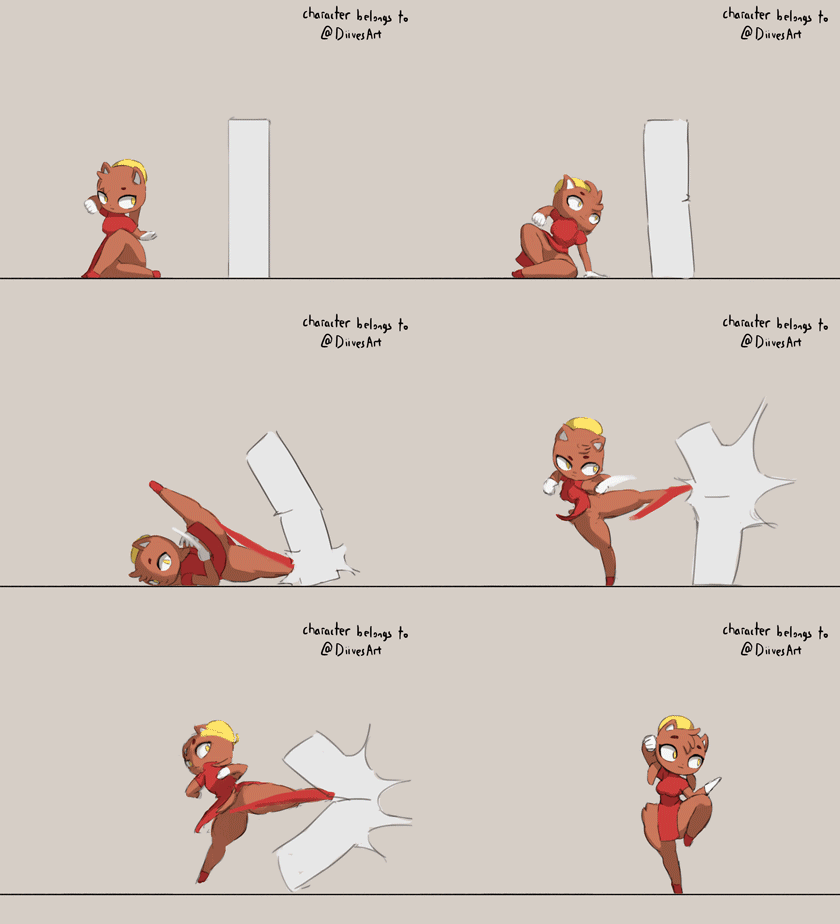
Showing off all the kicks!
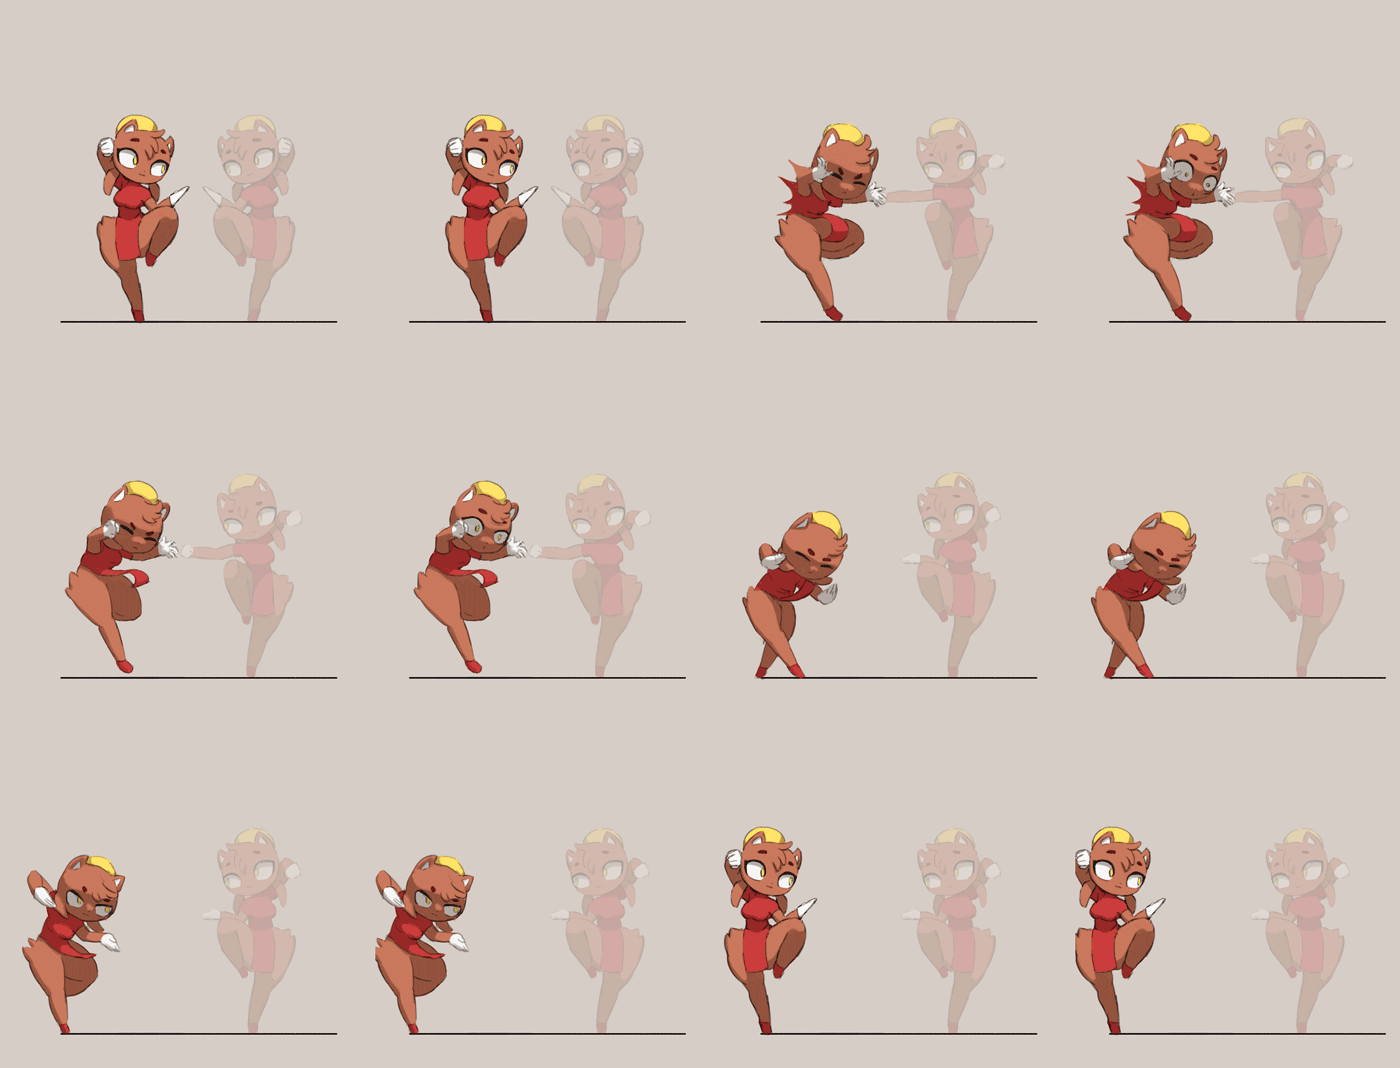
I found that even a small face change helps a lot with variation in hit reactions
Also, of course it's important to check in engine early and often and revise animations as necessary.
In Engine
Animation
Unfortunately, UE4 is not the greatest engine for 2D, but I'm most familiar with Blueprints so I continued with it. The most difficult part was having to recreate systems I'm already familiar with such as animation state machines and anim montages and I won't get into much detail here (especially as my solution is rather messy)
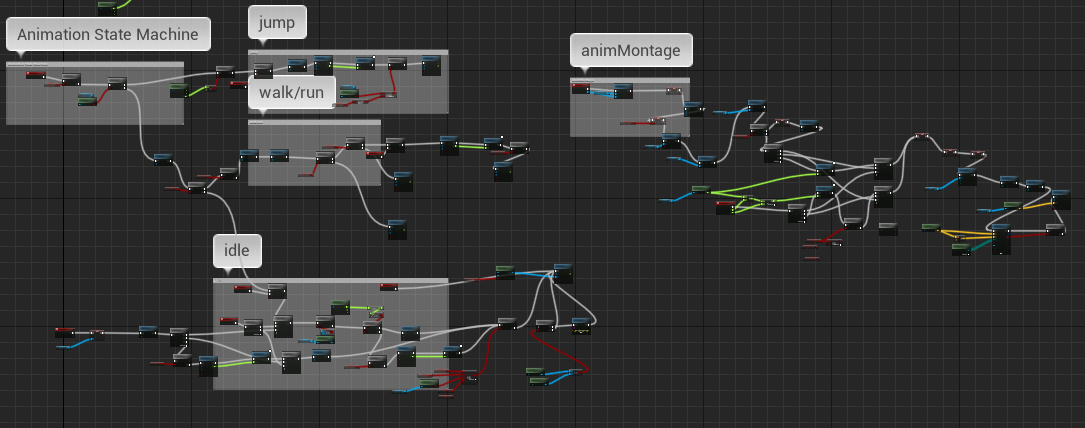
The main animation system of the blueprint. The animMontage basically halts the state machine and resumes after the montage ends based on parameters such as whether the player is crouching, moving, jumping, etc.
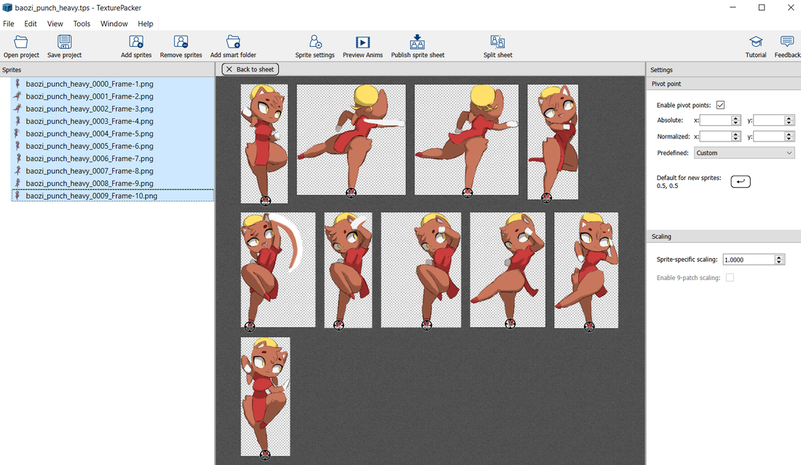
Using TexturePacker to pack sprites and define things like pivot points per sprite. Also has a handy export to UE4 feature!
Input
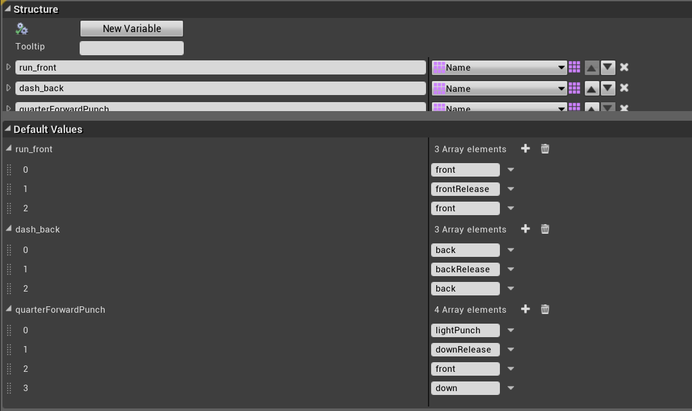
One of the biggest chunks of the project was making the input system. Most (pretty much all lol) 2D fighting games have the special input commands (such as quarter circle punch, etc) which I wanted to recreate. My solution was to create a "dictionary" of sorts where I can define an order of inputs. Then on every input it checks if the preceding order of inputs matches a dictionary entry. If it does, then it executes the corresponding behaviour.
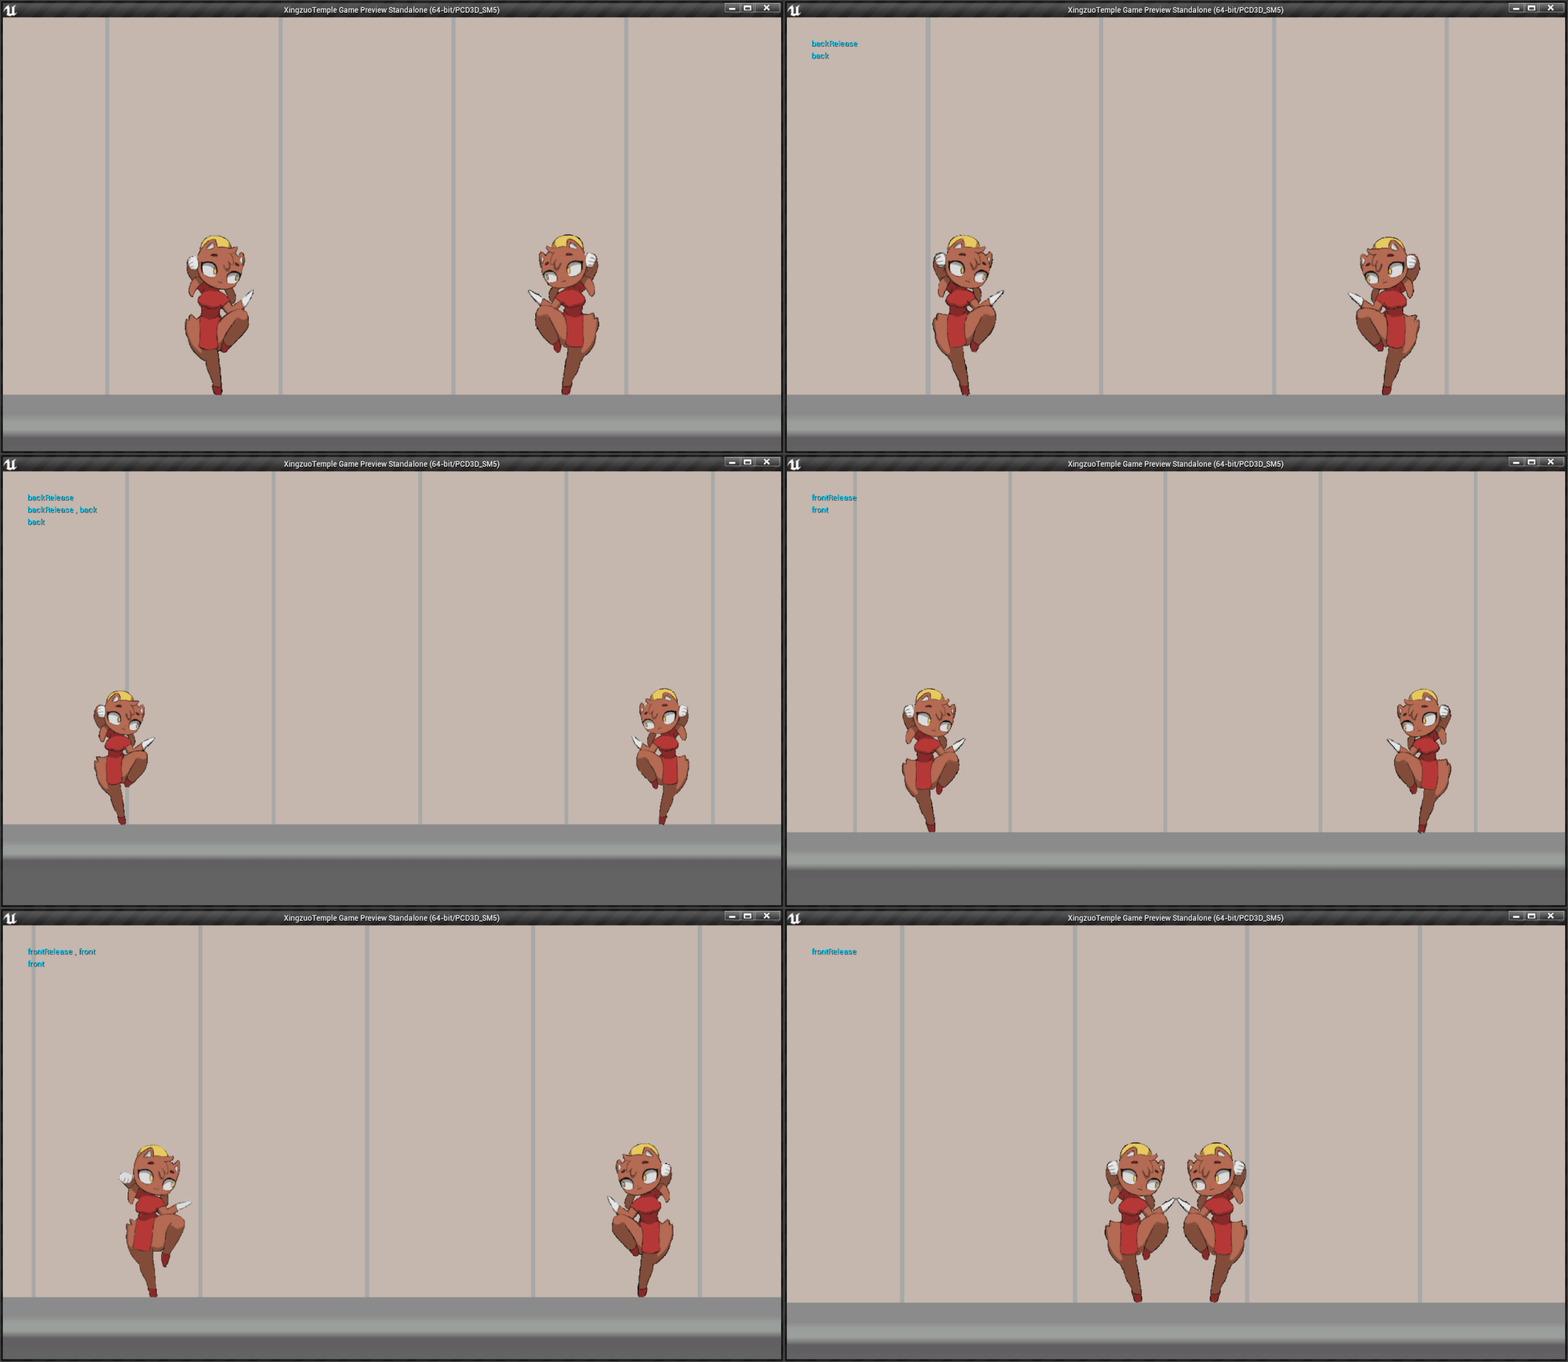
The above image is the data structure where I define a series of inputs to be a command. For example (as demonstrated in the gif), "back, backRelease, back" means "dash_back" and "front, frontRelease, front" means "run_front"
Root motion was handled in a simple but awkward method - I used a single 3D joint to animate root motion in Maya and then play the relevant 3D root motion animation at the same time as any corresponding 2D animation that requires root motion.
Collision:
The collision was also handled very awkwardly. Basically, collision is always on and during attacks, I hardcoded delays to fire off "hit" events whenever it reached a certain point in the attack animation. It made it rather difficult to work with for hitstop, but I managed to make a system that also allows custom hitstops per attack that makes it easy to set up a new attack.
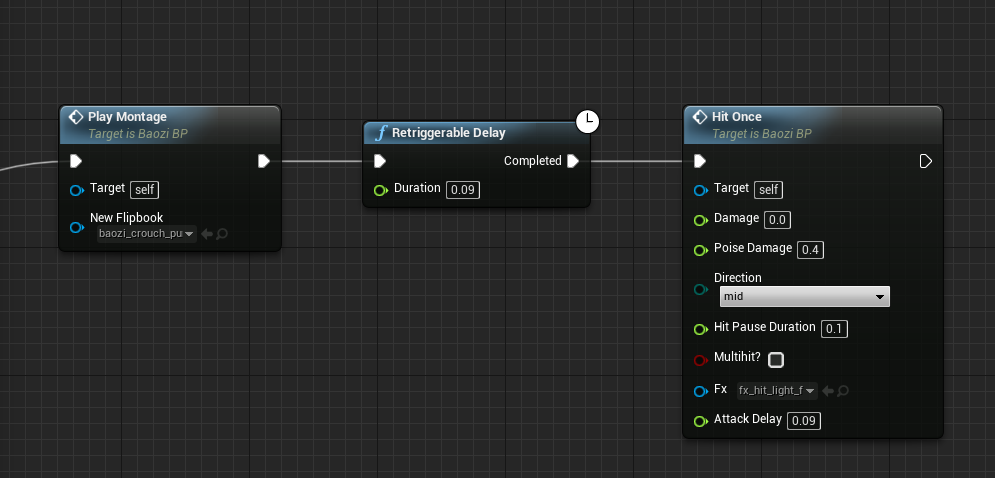
These are the nodes required for making a new attack: a "Play Montage" node to set the attack animation, a delay with the desired hit time, and the "Hit Once" node where I can set damage, knockback, direction of attack, the duration of hit pause, fx, and other parameters.
If I made this collision again, I would make the collision be on a per tick basis checking what frames the attack is on and turning it on if on a desired hit frame instead of using hardcoded delays (for example, mark a punch with a hit on frame 5. When the animation reaches that frame, it would then check for collision)
Camera:
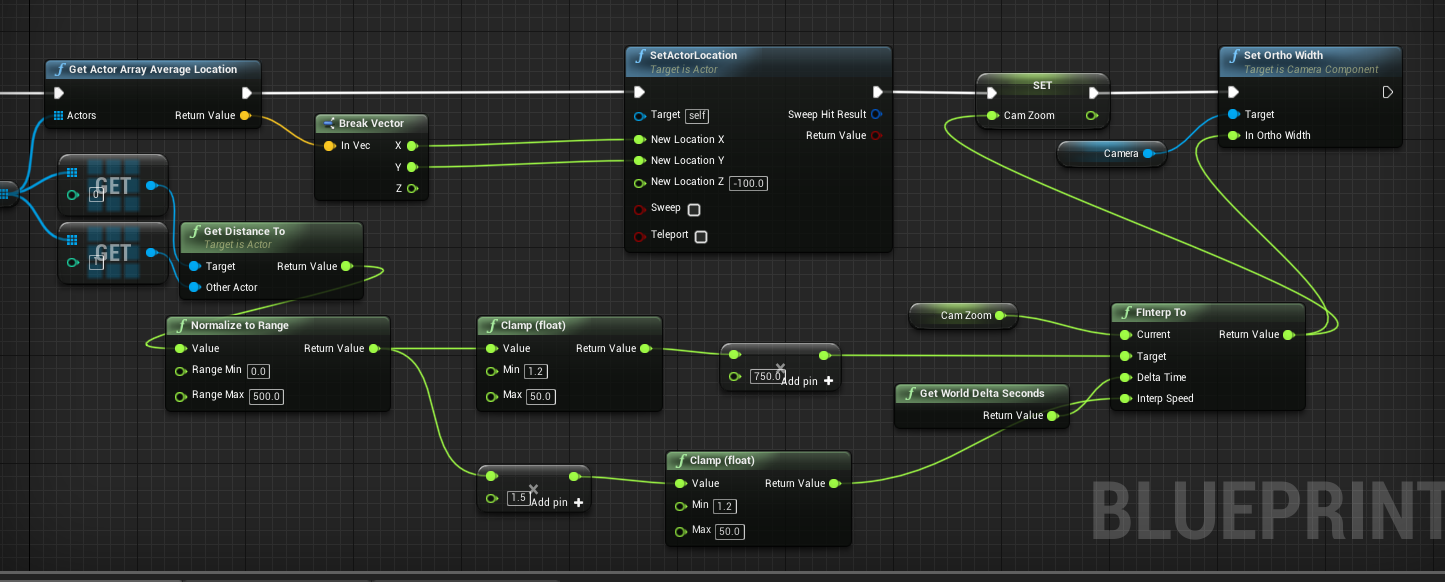
The camera is simple but pretty effective. All it does is stay in between the two characters on screen and zoom in/out depending on the distance between them. There is a minimum distance so it doesn't zoom in too far and the closer the two characters are, the slower it interpolates so it doesn't get jarring with small movements.
Simple camera graph to track both characters
