Metroid Prime style gameplay
Summary
I wanted to make a morphing style similar to Metroid Prime, but expand on it to make the gameplay feel more like "Samus" as she is often shown being more agile in cutscenes with the Morph Ball. There are also some unconventional animation systems that I will describe as well.
Video
Root Motion Breakdown
I wanted to go over this root motion because it's an unconventional method (at least I've never seen it before). In summary, I have the root motion for the FP gameplay split off from the full body mesh and also the first person mesh. The root motion is handled by a dedicated rig solely for the purpose of root motion. This allows for more flexibility in manipulating root motion while animations are playing without affecting the animation itself.
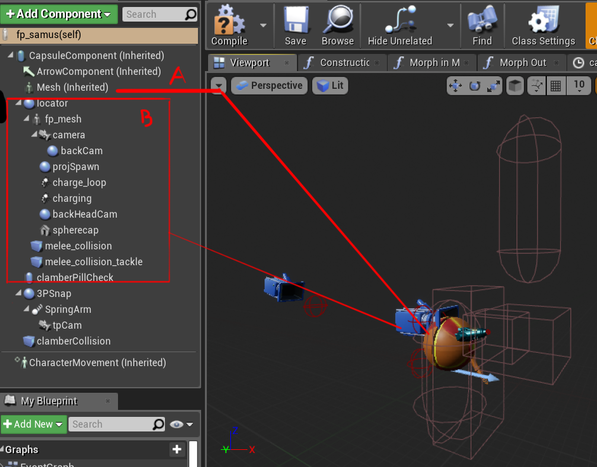
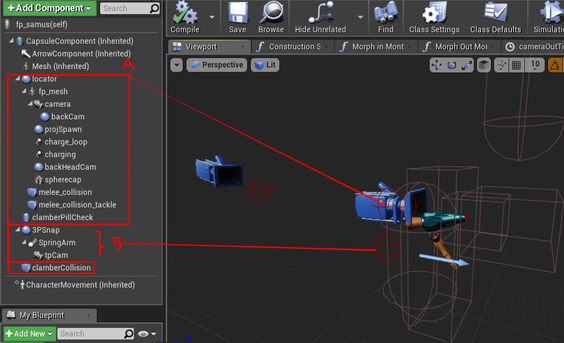
This is the component setup for the FP blueprint.
A) A dedicated rig for controlling the root motion of the character.
B) The first person mesh, camera, and several other components related to collisions mostly.
A) A dedicated rig for controlling the root motion of the character.
B) The first person mesh, camera, and several other components related to collisions mostly.
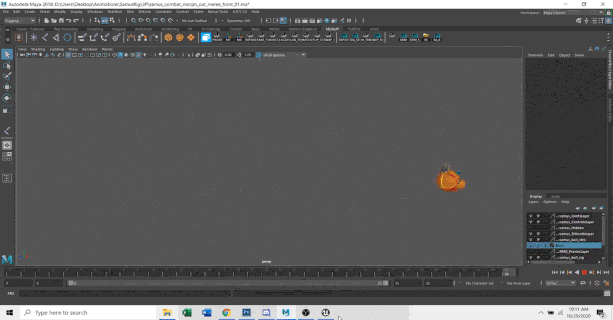
An example of how an animation is made in Maya with this split root motion system. The root motion is visualized by the ball and exported separately from the full body animation, which is root locked in engine.
As I mentioned above, the reason for splitting root motion is for flexibility and efficiency. One example is the short dash ability. I wanted to be able to control the distance through root motion, but if I did it through the first person rig, I would have to create a dash for all directions, which would be pretty inefficient. Instead, I can make a single dodge animation for the root motion and simply set the rotation to the player input right before playing the animation, which would then dash in the desired direction.
Note: for an animation with root motion in first person, 3 animations on 3 separate rigs are played simultaneously: the root motion anim on the ball, the FP anim on the FP mesh, and the 3P anim on the full body mesh.
Note: for an animation with root motion in first person, 3 animations on 3 separate rigs are played simultaneously: the root motion anim on the ball, the FP anim on the FP mesh, and the 3P anim on the full body mesh.
|
|
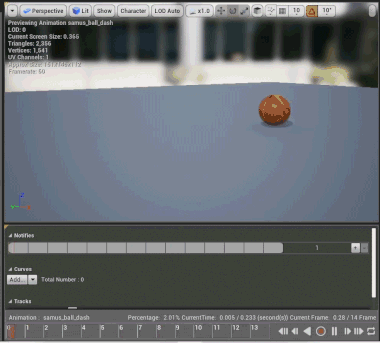
Dodging animation for the root motion. Set the rotation to the correct direction and fire it off!
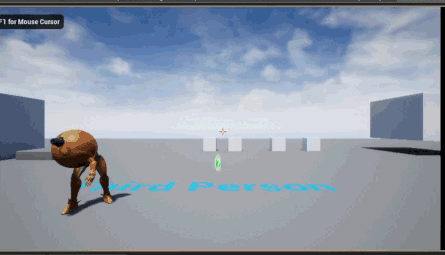
Another advantage of splitting off the root motion is that the root motion can be manipulated during the animation itself. In the above example, the player is able to start moving before the 3P dash animation is fully finished because the ball's dash animation is shorter, which increases responsiveness without having to chop off the 3P animation. Of course, this may introduce foot sliding as seen above, but that can be fixed pretty easily with some more refinement.
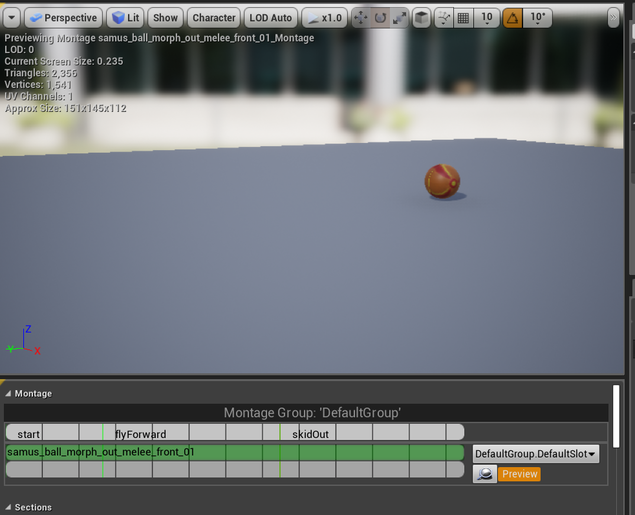
A different example of this is shown below. As shown in the clip below, the shoulder tackle travels a much shorter distance upon hitting an object. Since the root motion is separate, I simply set the play time of the root motion forward to when the skidding occurs, which is section "skidOut" shown in the image farther down. This prevents the need for creating a separate 3P anim for impacting and skidding out to a shorter distance, which is less controllable and could cause a pop.
Again, this method can introduce foot sliding easily so some more time would have to be spent to tune that.
Again, this method can introduce foot sliding easily so some more time would have to be spent to tune that.
|
|
Morphing and 3P Breakdown
This section will be divided into 3 parts: the first person (FP), the third person (3P), and the morph ball as they are all separate blueprints.
First Person (FP)-
The FP blueprint is the most important blueprint since most of the gameplay happens in this mode. It handles most of the gameplay logic for the FP mode.
The FP blueprint is the most important blueprint since most of the gameplay happens in this mode. It handles most of the gameplay logic for the FP mode.
This is the component setup for the FP blueprint.
A) The first person mesh, camera, and several other components related to collisions mostly.
B) Locator to attach the 3P blueprint to. See "Third Person (3P)" section below.
I don't think I need to get into the exact details of how I attached the 3P blueprint, but basically the location (not rotation) always follows the "3PSnap" component in the FP blueprint.
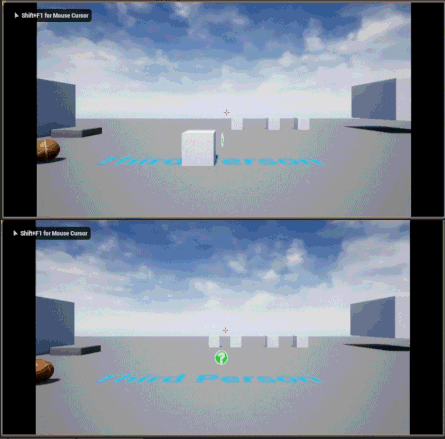
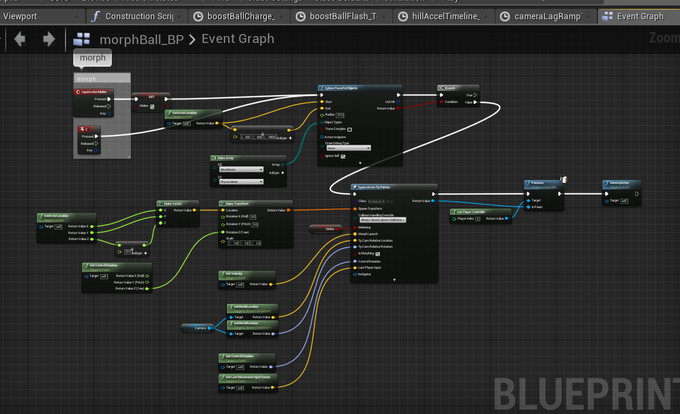
For morphing, as far as the logic goes it's pretty straightforward. Pressing the morph button fires off events that checks for input vector, velocity, current state (dashing, clambering, etc), and all that fancy stuff. Then it selects appropriate 1P and 3P animations and plays them. All morph in transformations have a notify that signals the FP blueprint to create a Morph Ball blueprint and possess it.
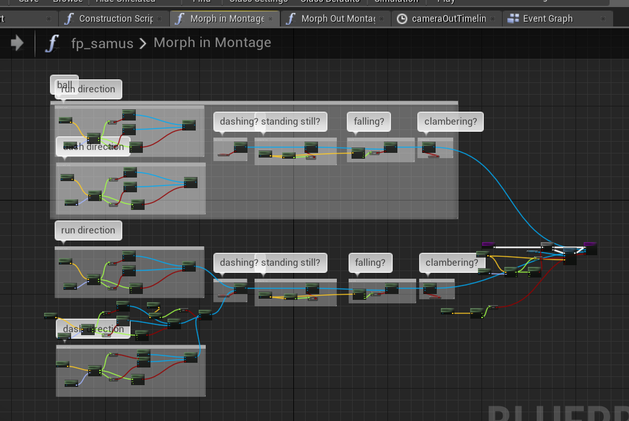
Not complete yet but this is the function that checks which animations to play when morphing into a ball.
When morphing in, the player camera is switched to the second camera called "tpCam" shown in the component setup. This camera is set to the current location and rotation of the FP camera and then lerped out smoothly to its zero position (which corresponds to the morph ball's camera location) by a timeline. This gives the animator control over the timing of the camera blending out.
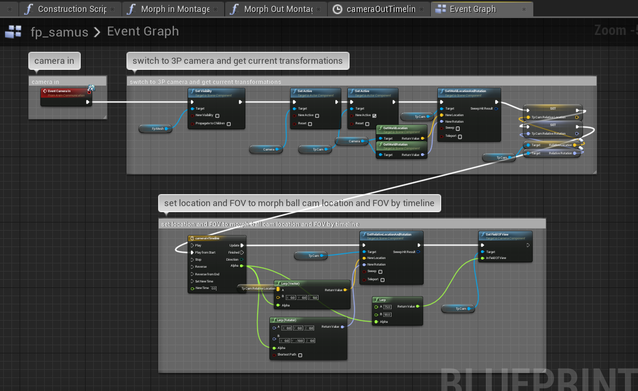
Graph for switching to 3P cam and blending it to the morph ball cam's location/rotation
Morphing out is basically the same except that I added a middle point behind Samus's head so that the 3P camera will always go there first before moving into the FP cam's position. That way the camera will always come in from behind her head to give the impression of moving into first person mode.
Third Person (3P)-
The 3P blueprint is almost purely visual. The location always follows the 1P blueprint's location. Most of its logic is simply playing an equivalent animation to the 1P animations, but there is one section that's more interesting which is the turning.
The 3P blueprint is almost purely visual. The location always follows the 1P blueprint's location. Most of its logic is simply playing an equivalent animation to the 1P animations, but there is one section that's more interesting which is the turning.
3P blueprint setup. The "samus_lowerBody" is what's seen in FP view and follows the same animations as the full body mesh.
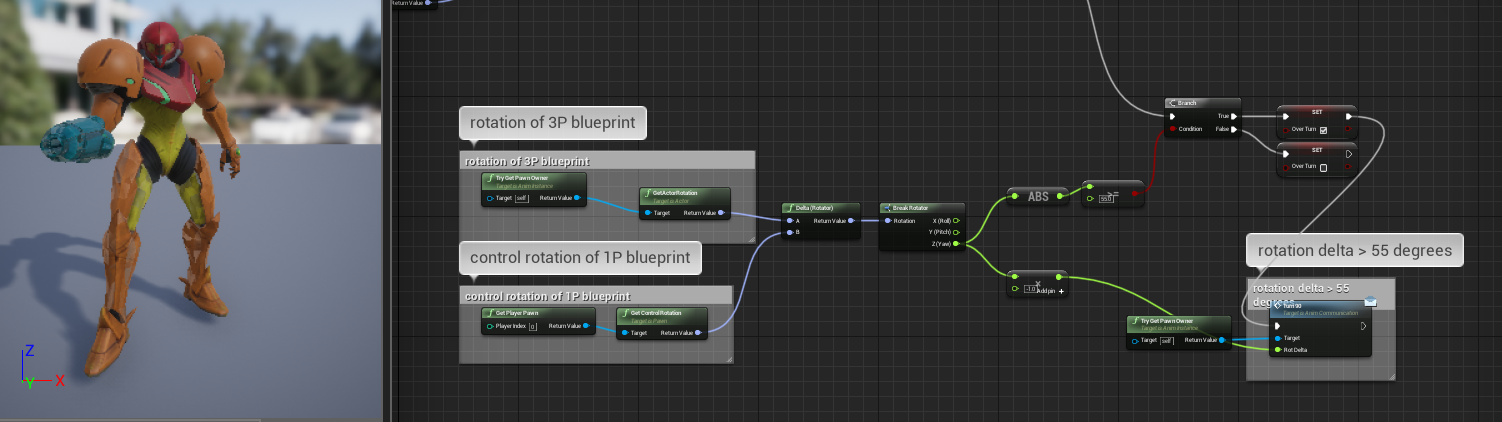
Rotation check section of the 3P animation blueprint. Note that the rotations being compared are the THIRD PERSON'S rotation and the FIRST PERSON'S control rotation.
The 3P animBP is responsible for checking whether the 3P mesh needs to turn. It compares the 3P actor's rotation to the 1P actor's control rotation. If this rotation exceeds a certain threshold (55 degrees in my setup), then it triggers an event to the 3P actor blueprint that determines which direction to turn, then plays the corresponding turning animation which has root motion, rotating the 3P actor. If the rotation exceeds an even higher threshold, then I currently have it set to update the rotation to turn faster to prevent the torso from turning 180. This introduces foot sliding if rotating too quickly, but can be easily updated to play a faster rotation animation as well to fix the foot sliding.
This same setup is actually used by my enemy as well. The event to turn around is a generic event that can be called to any actor, which is very handy for reusing certain nodes.
This same setup is actually used by my enemy as well. The event to turn around is a generic event that can be called to any actor, which is very handy for reusing certain nodes.
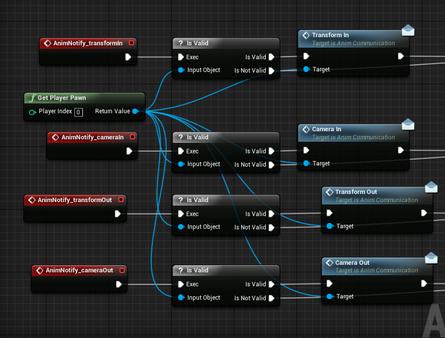
For morphing, most of it was already explained in the FP section above. I use notifies to determine when the camera should transition in or out of 3P.
|
|
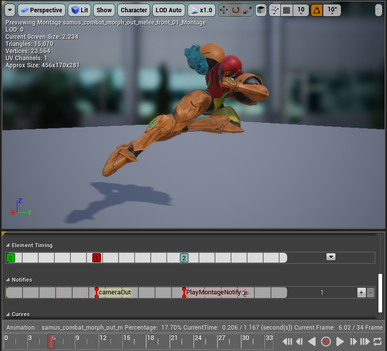
Notifies placed in the morphing montages determine when the camera transitions in or out of 1P view
Morph Ball-
The morph ball blueprint contains its own gameplay logic.
The morph ball blueprint contains its own gameplay logic.

Pretty basic setup. The inherited Mesh is redundant and doesn't contain anything.
There's not much to be said about the morph ball. Its logic is pretty simple. For example, the bombs are done through just spawning bomb actors.
For morphing, most of it is handled by the FP blueprint. The ball just creates an FP blueprint at its location and then passes along relevant variables such as melee or velocity.
For morphing, most of it is handled by the FP blueprint. The ball just creates an FP blueprint at its location and then passes along relevant variables such as melee or velocity.
Check if there's enough space to morph, then spawn an FP blueprint and pass along info.